Lactate testing protocol
Performing a lactate threshold test is quite simple and can be conducted in a similar manner across a whole range of sports. You will need to pick a relevant metric you want to track, examples would be power on a bike or indoor rower, or heart rate for most other applications The test is best undertaken in a controlled environment as attention to detail is important. Good test environments include:
- Indoor bike
- Treadmill
- Velodrome
- Running track
- Indoor rowing machine
- Other indoor cardio equipment
What you will need
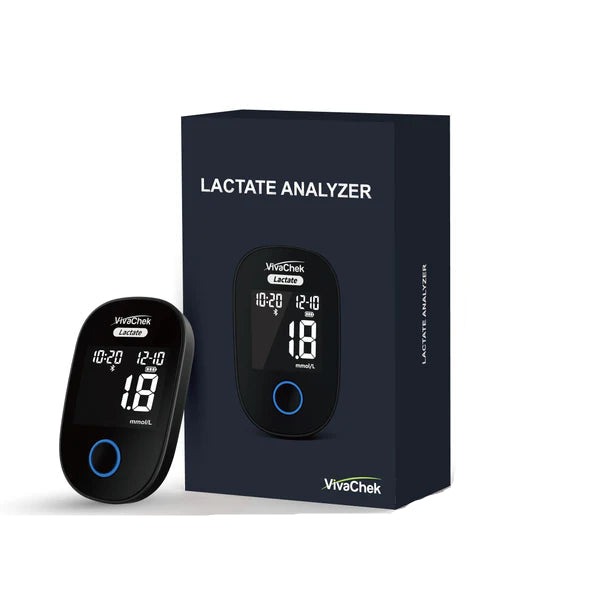
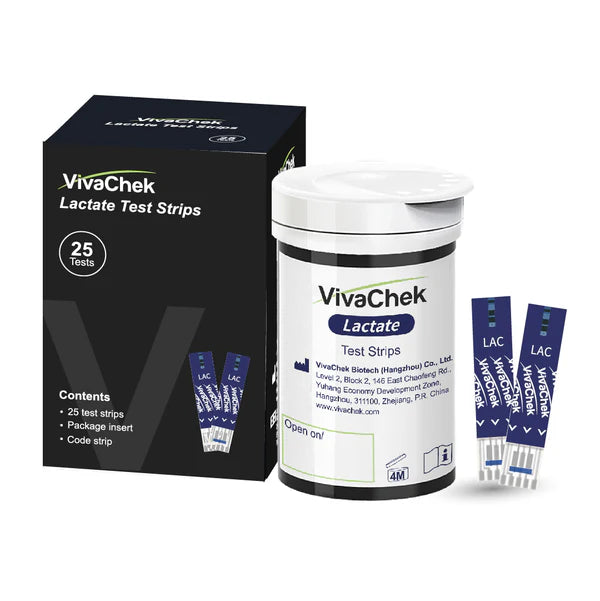
- VivaChek Lactate Analyzer and testing strips
- Lancets (28 gauge 1.5-1.8mm are ideal but most will work)*
- Sterile alcohol wipes*
- Clean paper towels*
- Something to record our results on - a pen and paper is fine!
- A friend will make things easier but you can do this yourself pretty easily
*These are all available at your local chemist easily and cheaply.
Got questions? See our FAQs HERE or get in touch!
So. let's get going!
1. Preparation:
- Hydration: Stay adequately hydrated in the hours leading up to the test. Avoid excessive fluid intake immediately before the test.
- Equipment preparation: You will be using a new lactate strip and lancet for each test, lay them out on a clean small towel so they are easy to pick up.
2. Testing Protocol (Example - Adjust based on your experience and fitness level):
This protocol uses incremental stages of increasing intensity. You may need to adjust the duration and intensity levels based on your individual fitness. You must be generally healthy and able to complete the test safely, consult your doctor if you have any concerns.
- Warm-up: Begin with 10-15 minutes of easy effort to increase blood flow and muscle temperature. This should feel very light, no perceived exertion.
-
Stage 1 (Baseline): 5 minutes at a very light intensity, approximately 60-65% of your maximum heart rate (MHR). Take a blood lactate sample at the end of this stage.
-
Stage 2 (Incremental Increases): Increase the intensity every 5 minutes. The increases should be around 3-5% of your target metric. Aim for the effort level to be very steady, and stay as close to your target as possible. At the end of the five-minute period take your lactate level as per the detailed instructions you will receive with your lactate analyzer. The trick is to get the blood sample as quickly as possible at the end of the 5 minutes, you should stop to take the sample safely but getting the sample quickly means you get the blood you are testing outside your body so the lactate level is locked in! Because the time intervals are 5 mins, the short break here will cause any problems, so don't worry!
-
Monitoring and recording: Monitor your heart rate, perceived exertion (RPE), and any signs of discomfort. Record your lactate Levels at each effort level for your target metric.
-
Termination: The test continues until your blood lactate levels rise significantly above 2-2.5. If you reach 4 you should stop immediately as your test is certainly complete and further efforts will be of limited benefit.
3. Post-Test:
- Cool-down: Finish with 10-15 minutes of easy cycling.
- Data Analysis: Once you've collected your data (lactate levels and power output/heart rate at each stage), plot it on a graph (lactate level vs. power output/heart rate). The lactate threshold is typically identified as the point where the lactate level begins to rise sharply. This is often visually depicted as the inflexion point on the graph.
- Record Keeping: Keep a record of your test data for future reference and tracking progress.
Example graph over 2 sessions 6 weeks apart.

The example graph above shows how an athlete has increased the power-based lactate threshold from 285-290 watts to around 300 watts.
The key thing to understand here is that when you apply accurate threshold training over extended periods of time you will reach your true athletic potential. If your training is too hard or too easy you will not.
From our experience, most athletes tend to be OVER, not under their target levels. This leads to workouts feeling exhausting, excessive fatigue and poor training outcomes. Your threshold sessions should be "hard but doable". The "no pain no gain" attitude is just not backed up by science.
Important Considerations:
- Accuracy: The accuracy of the test relies heavily on proper technique in blood sampling.
- Individual Variation: Lactate thresholds vary greatly depending on fitness level, training history, and genetics.
This is a general guide. Specific protocols can vary. Always prioritize safety, remember to adjust this process based on your fitness level and the specific equipment you use.
What are you aiming for?
One of the best things about lactate testing is that you can actually "see" your fitness gains. We cannot overstate how much this positive feedback helps you as an athlete.
Your aim is to "move" your graph plot above to the right. The further to the right, the more work your body can undertake and not become impeded by lactate production. Your lactate threshold will move closer to your VO2 max.